Showing posts with label 3-D Projects. Show all posts

Monday, September 19, 2011

Lollies Turtorial

 Tonight I have a tutorial for making Lollies or Medallions! Last week I happened to visit Sage Kimble's blog and she had a video tutorial. After spending almost all week end making Lollies, I guess you can say I'm addicted! They are so much fun to make.
Sage it's all your fault. lol
Not really, but they are addictive. I haven't attempted to make a video yet so I thought I would share my ideas and a tip or two I learned from Sage. Here is my wreath hanging on my Studio Wall.


Lollies Tutorial

 I used a variety of designer series papers and  card stock, buttons, punches and Pumpkin Pie 1 1/4" Striped Grosgrain Ribbon, retired.

Stampin' Up! new Simply Scored Tool made making the lollies so much easier. Simply Scored come with a stylus, 6 place markers and a drawer to store the stylus, markers and  a bone folder.
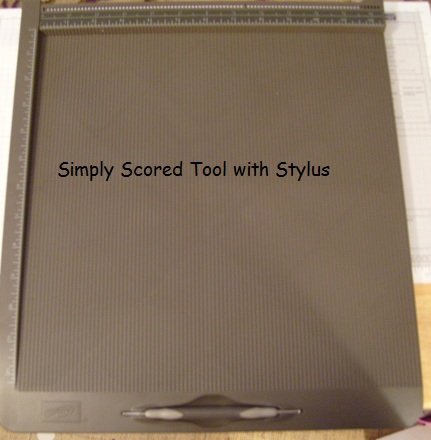


The longest piece of paper is before I used the Simply Scored Tool. The piece above is after I have scored the 12" x 1 1/2" designer series paper.
Here I have turned the scored piece over and placed a piece of Sticky Tape on one end. When the paper is held up the Sticky Tape is on a scored section that faces down. When  attaching it to the other end, the other  end needs to be facing up.


Here is the circle of designer series paper attached by Sticky Strip
 
To make it easier to glue with a hot glue gun, Sage shared that she uses a lid that is approximately the same size as the Lollie.I placed the side down that I wanted to show when finished. As I hold down the circle of paper, with a glue gun, place a rim of glue around the inside circle. By careful not to burn your fingers or get any glue down in the hole. Place a circle on top of the glue and hold it down until it cools.
Here you can see where I turned the Lollie over. You are looking down inside of the Lollie. You can choose a variety of ways to cover the hole.On the bottom is where I placed the glue and a 1" circle of card stock.
 I turned the Lollie over an used a  1" circle of Real Red card stock and punched a Very Vanilla flower from the Boho punch. I topped it off with a Early Espresso Designer Button.
 Here is my finished Lollie. I made a Christmas tag by adhering the Lollie to the Early Espresso card stock and tying a bow using 3/8" Real Red Taffeta Ribbon. Again, here are Sage's tips: Sage uses a low temperature glue gun and a lid that is close to the same size as the Lollie. I tried to make them both ways, and using the glue gun and lid makes it much easier and faster. I apologize for the fuzzy photos, I had trouble with my camera tonight. This is the first time I have typed any information on the photo itself and I can see I need to work on that too. I hope you enjoyed the Tutorial and will give making Lollies a try.
 Thanks for stopping by!Happy Stamping!  Jane
 If you want to give Lollies a try, you can find the Simply Scored Tool, Designer Series Papers, Buttons and Brads at my Stampin' Up! store. http://janegiggy.stampinup.net
 

Saturday, June 18, 2011

Gifts for my Aunt Barbara

Hi...Happy Saturday June 18th!

My wonderful Aunt Barbara Pierucki is celebrating a birthday tomorrow June 19th!  Happy Birthday Aunt Barbara!
 I love you so much!

My Aunt Barbara has been a special person in my life as long as I can remember. My mother was her older sister by 14 months. Aunt Barbara was a second mom to me. Looking back I have so many wonderful, warm memories of spending Summer days with the Pierucki family. I was loved, cherished and I felt like one of "her kids." What fun we had. Aunt Barbara and the late Uncle Howard have four children. Carol, John, Andy and David. Carol is about 3 1/2 years older than me and she has always treated me like an peer not a little cousin. We spent many fun hours in the Summer time playing in a tree in the back yard that was perfect for climbing. They had a school issued size swing set and boy did I ever take advantage of that!
Aunt Barbara is a wonderful cook and baker and I can remember the delecious aroma coming from the kitchen at meal time. One thing that stands out in my mind is the welcoming aroma of their house. I can still remember the smell today, many years later. It was sweet, comforting,  clean, and safe. Through out my life Aunt Barbara has been a warm spot in my life. She is a wonderful example of a loving Christian wife, mother, grandmother and aunt. I've have been truly blessed to have her in my life.

Coming from Michigan originally, now Aunt Barbara lives with her only daughter, Carol in Arizona. We haven't seen each other in years, but we talk on the phone, write and remember each other in prayer.
This past two weeks I have been making cards, etc. to send for her birthday present this year. Here are some photos of the goodies I sent her.

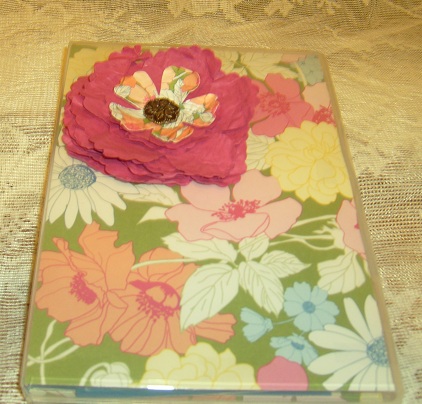
Below is one of Stampin' Up! clear-Mount Stamp Cases I used to hold four cards with envelopes. I lined the front and back of the case with designer series paper and added a flower with an antique brad as the center.
Sock Monkey cards...this set is retiring July 1st.
 One more Sock Monkey card and a sneak peak at the new Pennant Punch coming July 1st!
Fun and Fast Notes retiring July 1st
Lego card
I used the Square Lattice Embossing Folder to make the next two cards. After cutting or punching out shape I glued it to Whisper White card stock with Tombow glue. I ran it through the Big Shot machine and the paper or designer series paper is embedding into the Whisper White card stock. It's so cool!
Next to stamping, I love to crochet and made these dish clothes to add into the gift box
I filled a medium size Pirority Mail box with all kind of goodies...too many to show here.
Aunt Barbara has over 18 great-grandchildren so I made many  birthday cards for her.
I wish I could be with her when she opens her birthday gift!

Thursday, December 9, 2010

Christmas Count Down...Paper Pouch


Paper Lunch Sack Paper Pouch


My first  Paper Lunch Sack Pouch

I'm making 7 of these for part of our grand children's Christmas gifts. We have 6 granddaughters and one grandson.  What fun I had shopping for little goodies to put in their pouches!
For my first pouch I used a white lunch sack. Fold the top of the bag down to the height desired for the pocket. Sew on three sides and you have your pocket. Just add Designer Series Paper, ribbon, punches buttons, etc. I used Candy Cane  Christmas DSP to cover the stitching on the front of my pouch. Added white ribbon and two Real Red buttons on the bottom. I thought the pouch needed a little more, so I added retired Real Red Gingham ribbon. I filled my pouch with a Bubble Gum candy cane, Hershey's bar, a test tube with Tic Tacs, a pencil, lip gloss and tissues in ice cream cone theme from a local craft store.

You can fill your paper pouch with hot cocoa pouches, a candy cane, or a gift card, candy or coffee pouch and a single package of cookies. The list is endless. I hope you will give this a try. It's another fun project!

Visit Kim and Beth's blog for more details.
I can't take credit for the idea...I saw it on Kim Score's blog.www.paperpunchaddiction.com/
Thanks to Kim and to Beth Apalooza for the directions on how to sew the lunch sacks. You can see more on Beth's blog.


Don't forget to leave me a comment on the post showing my Christmas Tags. Drawing will be Friday after 6:00 p.m.
Happy Stamping!
Jane


Tuesday, May 11, 2010

Mother's Day Flowers and a Pansy Card


MOTHER'S DAY FLOWERS AND A PANSY CARD

I hope all you mother's out there had a wonderful Mother's Day! It was the year of the flowers around the Giggy house. All three of our married children and famlies brought me beautiful flowers.
The day was sunny but cool. What a great Mother's Day!

Last week I was busy making different types of flower cards. I posted some of the cards made with using the scallop punch and scallop die.


This week I'm focused on Pansies!

Judy Marshall was so kind to offer her idea for the pansies and share the template for the pansy seed packet. Isn't this card yummy? I got on a roll and couldn't stop making pansies. The blue pansies are Lovely Lilac but show up blue here.

I used Whisper White card stock and punched out a lot of butterflies using the Butterfly punch. Next, I used the Auqua Painter, filled with water and painted the reinker color on the butterflies. I painted the centers first and then the outside of the flower. I sprayed water on the butterflies and scrunched them up in a ball; then unrolled them and flatened them out to dry.

Once dry I used Tombow Multi Purpose Adhesive and sprinkled with Dazzling Diamonds for the center of the pansies. For the leaves I punched out the wing on the Extra Large Two-Step Bird Punch and spritzed them with water, scrunched them in a ball, strainghtened them out and folded them in half to dry. Once dry I attached them under he pansy using Tombow Multi Purpose Adhesive. I used the Eyelet Border Punch and the Finial Press Textured Impressions Embossing Folder both from the Big Catalog. This was a fun project. I hope you will give it a try.

Happy Stamping!

Monday, April 12, 2010

On Board Bird Door Hanger

I made this door hanger for my sister in-law, Phyllis, for our Sister In-Law Stamping day this Tuesday. I used Cottage Wall Desginer Series Paper on front and back. Stamped  and cut out images from the Vintage Vogue set in Lavender Lace, Lovely Lilac and Pale Plum (all these colors will be retiring in June). I attached half pearls and small flowers from the Pretties Kit, Whisper White Taffeta Ribbon, and three butterflies using the Beautiful Wings Embosslits Die. I used one Rhinestone I had in my stash, a pearl for the birds eye and Certainly Celery 5/8 " Satin Ribbon from the Occasions Mini Catalog.
These are so much fun to make. You have until April 31st to place your order.
Happy Stamping,
Jane