
WELCOME TO THE 4TH WEEK OF THE 12 WEEKS OF CHRISTMAS!
We lost power yesterday when the high winds knocked a tree down on a main power line. I apologize for the lateness of this post.
AS I MENTIONED ON THURSDAY, I'M SO EXCITED TO BRING YOU THIS TUTORIAL. YOU WILL FIND ALL THE INFORMATION YOU WILL NEED TO COMPLETE THE PROJECT FOR YOURSELF OR GIVE AS A GIFT.
CLEAR-MOUNT STAMP CASE PORTFOLIO


TO GET STARTED YOU WILL NEED
1- 5" x 7" tablet...trimmed to 4 1/2" x 6"
1- 12" x 12"piece of Designer Series paper pieces cut to (2-3)
4 7/8" x 7"
1- tablet topper cut to 4 1/2" x 2" score topper at 1 1/4" & 1"
I found 5" x 7" tablets at local Office store and had them trimmed to 4 1/2" x 6". If you ask they will trim the tables for a small fee. I paid $1.09 to have 8 tablets trimmed. The total cost for the tablets and the trimming came to $10.04 plus tax. That's about $1.30 per tablet.

Step 1
I cut 3 pieces because I wanted the side you see above to show on the inside of the case on the left side. On the right side I used only 1 piece of designer series paper because the tablet will cover most of the paper. You will see more on this in additional photos. When you open the case you will see a plastic sheet that is attached. I turned the case upside down and slipped the Designer Series Paper in between the plastic sheet and the case itself. I apply some SNAIL Adhesive on the edges to keep the paper from moving.

After attaching the Designer Series Paper to both sides of the case I prepared the tablet topper and tablet.
Step 2

The topper will cover the top of the tablet and give the the tablet a finished look.

The red strips are Sticky Strips which is a very strong adhesive that will hold just about anything in place. I attached two strips to the top of the tables to cover any writing.

Step 3


Step 3

At the top left is a Scallop Envelope cut using the Big Shot using Pool Party card stock. This will be attached to the inside of the case to hold stamps, coupons, etc. I used my bone folder to make crisp creases and hold it together with Sticky Strip.

Making The Flower
Step 4


I cut a number of flowers from the Flower Fold Die using the big Shot machine and Spice Cake Designer Series Paper.

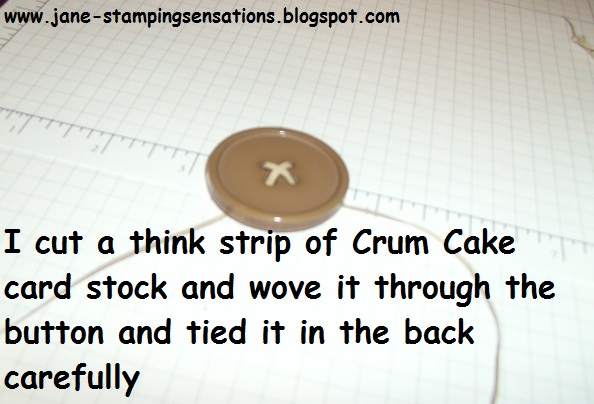
That should be "I cut a thin strip", not a think strip." I was having problem using my program.


Step 5
Putting it all together

After attaching the Designer Series Paper and the tablet, I attached the calendar to a 2 1/2" x 2" piece of Pool Party card stock. I added a 2012 calendar in the Scallop Envelope.

I purchase my calendars at Vippies online. They have a wide variety of size of calendars and size of print. They are reasonable and I have had good service from them.

Close up photo of the finished Portfolio and the flower with the button. I attached the flower with Sticky Strip.

Another look at the finished Portfolio
I started making Portfolios after I saw the idea on Patty Bennett Blog and added some features of my own. It's a nice size to carry in your purse or use it at the office or at home. I carry one in my purse. On a previous post, I showed one I made my husband to hold his receipts in his truck....No flower for him!
Products Used
Clear-mount stamp case: #119105
1-sheet Designer Series Paper: Spice Cake (Holiday Mini) #124003
Card Stock: Pool Party #122924 & Crumb Cake #120953
Designer Buttons: Spice Cake (Holiday Mini) #124113
Adhesive: SNAIL #104332 & Sticky Strip #104294
Big Shot cutting machine # 113439
Flower Folds Bigx XL Die: #115970 & Scallop Envelope Die # 113462
To purchase any of the Stampin' Up products click here
To purchase any of the Stampin' Up products click here
For your convenince I had added the Holiday Mini to my left side bar. You will find all the products I used in this tutorial.
I hope you have enjoyed my tutorial and will give it a try.
Tomorrow I will have a tutorial on how to make Top Note Favors. This tutorial is pushed back a day due to our power outage.
Have a great week end!
Happy Stampin'
Jane


No comments:
Post a Comment